Monday, July 17, 2017

What do I do, how do I start? Guide to being a C# web developer.


Welcome to the “What do I do, how do I start?” relatively all encompassing guide to becoming a C# web developer.


These are very solid step by step directions. Use it as you wish and feel free to sub out whatever. I figured it is easier for someone in the industry to give advice having done it than for someone to try to guess what they need to do. This kinda pairs up with my C# study guide in another blog post.


Completing the entire guide will cost you $30 for a month subscription on one JavaScript website.. And everything else on here is all free applications and materials to learn.  You can sub out that JavaScript section for free materials too if you really want to do it all for free, but that site is just awesome and interactive and worth it.  


Preview/Notice/Disclaimer/Stuff:
  • Everything without “optional” you really, really need to know to be a web developer. Note there are obviously other tracks you could do like Java etc., this is just a specific set of steps to get to a specific job as a “C# full stack web developer”.  I went in the order you should do everything, top down. A lot of getting an interview depends on on how well your resume is written, how well your cover letter is written, and what kinda of GPA/job experience (did you hold jobs for a long time? Did you have gaps between your jobs? etc.) you have and how consistent it is… also if you have a well written nice looking blog and if you have a GitHub with projects on it.  Boring generic resumes and cover letters get thrown in the trash.  You NEED to have a very powerful set of both.  A lot of getting a job will be your people skills, communication skills, ability to show your understanding, breadth & depth in certain topics, and how well you know all the technologies they listed on the posting. I believe getting a job is more dependent on your competition and not you individually.
  • I am biased in this guide and picked one option for technology / blog choice / IDEs.  It is just easier this way and I don’t want to explain all of the options out there, this is a quick start guide.  Also if I get questions from you, I can answer them because these are all things I have used / use currently.  Yes, you can use Wordpress or Java etc. instead.
  • Yes you can do Mobile, Machine Learning, Desktop, or whatever else instead. I just am not one of those developers and cannot write you a guide for that. I have no idea what you need to know to get those kinds of jobs. Just writing about the area I know about.


Open up accounts
  1. Open a Blogger account
    1. Install SyntaxHighlighter to your Blogger http://alexgorbatchev.com/SyntaxHighlighter/integration.html


Download software
  1. Download Notepad++


Learn HTML:
  1. Go to the following: http://www.htmldog.com/guides/html/
  2. Complete all of the Beginner tutorial section
  3. HW/Project: Create a sample website using Notepad++ about a Nintendo hero.  Save it as a .HTML page.  When you are viewing the file on your Windows Explorer, right click to see in a Browser to view as HTML and right click to Edit/View in Notepad++ to edit the HTML code.  As you change HTML code in Edit mode you can hit save, then refresh your Browser viewing the HTML page to see the changes.  
    1. Include a photo of the Nintendo hero, the name in bold, then a link from the hero’s name to any Nintendo hero guide, 3 paragraphs with random text, and a bulleted list of your favorite items/powerups/whatever to get on this hero.
  4. Complete all of the Intermediate tutorial section
  5. HW/Project: From your previous HTML page, put your paragraphs inside of div tags and give them an ID or a class name. Make a short blog post about something you learned about in HTML, a screenshot of your HTML page, and use the syntax highlighter to post your HTML code online.
  6. Complete all of the Advanced tutorial section
  7. HW/Project: Make a blog post about how to target HTML to different versions of a browser and a few examples of when/why this would be very useful.  

Learn CSS:
  1. Complete all of the Beginner tutorial section
  2. HW/Project: Take that same HTML page you were working on before. Add style tags “<style>” inside of your “<head>” tag and add some global CSS to change the background color of the page.  Add some inline CSS to change the colors of each paragraph to be different.
  3. Complete all of the Intermediate tutorial section
  4. HW/Project: Add the same class selector to each div holding a paragraph.  Also give each div a unique ID.  Add a background image of some pattern you can find on Google images.  
  5. Complete all of the Advanced tutorial section (these are not as commonly used but you need to know the extent of what CSS can do so make sure you read through all of it and try a few things out in your sample html page)


Learn Twitter Bootstrap:
  1. Go to the following: http://getbootstrap.com/2.3.2/
  2. Use this as a reference: https://www.w3schools.com/bootstrap/
  3. Learn about Responsive Web design: https://www.w3schools.com/html/html_responsive.asp
  4. Build yourself a responsive webpage using Bootstrap, with just HTML and CSS.  You should be able to shrink down your page to mobile size and it still looks decent.


Download software
  1. Download Visual Studio Code.  This is an IDE:  http://searchsoftwarequality.techtarget.com/definition/integrated-development-environmentThis is for front end code only (HTML, CSS, and JavaScript) AKA client side. You would use this for making front end only projects or if you were to break your project up into a front or back end portion.  Code is a much more lightweight program and often more liked that the full Visual Studio, it is much quicker.


Learn JavaScript:
    1. It used to be free long ago but it’s killer good site, it’s put out by PluralSight.  It is $30 for a month. I would recommend paying this once and completing the full JavaScript course in a month. It is worthwhile and the only thing on my guide that will cost any money. Complete the 5 JavaScript language courses and the 2 jQuery courses in one month and cancel your subscription.

How to use Google Debugger
  1. Understand HTML and CSS in the Chrome Debugger: http://blog.teamtreehouse.com/tips-debugging-html-css
  2. More HTML and CSS Chrome Debugger stuff: https://developer.chrome.com/devtools/docs/elements-styles
  3. Go through this tutorial: https://developers.google.com/web/tools/chrome-devtools/javascript/

Download software
  1. Download Visual Studio Community 2017. This can hold all of your code front and back end (HTML, CSS, JavaScript, C#, additonal frameworks, unit tests, connections to databases, config files, everything..).  
  2. Download Fiddler

Open up accounts
  1. Open a Github account
  1. Open a Stackoverflow account


Learn C#:
  1. Go to the following: http://www.learncs.org/
  2. Go through all the exercises.
  3. Go to the following, you need to know all of these topics in order to do well long term with programming. It will be hard to fully understand until you start working, but conceptionally get as strong of a grasp as you can, then come back to this site and go over it again and again in your first year of dev. This site is very crucial and everything on it is important: https://www.tutorialspoint.com/csharp/index.htm
  4. Go through other problems on this site:http://www.codekatas.org/casts/tagged/csharp
  5. Optional, take a free Coursera course: https://www.coursera.org/learn/game-programming
  6. Build a simple calculator with addition / subtraction / divison / multiplication and no order of operations. Then try it with order of operations.
  7. Do the first 10 problems on Project Euler: https://projecteuler.net/
  8. Build yourself a small app that takes in multiple inputs from a user, utilizes a list internally, then will read off to the user from the list what numbers they entered.
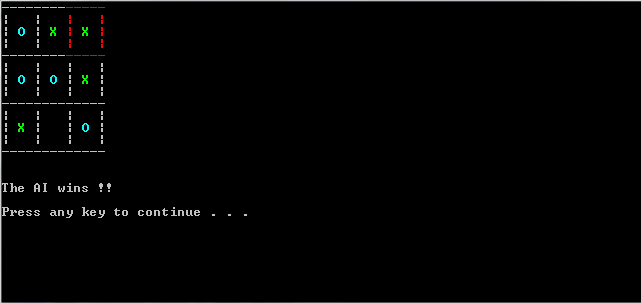
  9. Build a simple 2 player tic tac toe program. UI can just be console printing out ASCII characters. For ex. http://mmnaviwala.com/images/ttt_5.PNG
  10. Try to build an unbeatable tic tac toe program (1 player).


Learn REST APIs:
  1. Go through this site and video: http://www.restapitutorial.com/


Learn LINQ:


Learn Unit Testing:

Design Patterns:
Learn SOLID Principles:


MVC:


Learn Gang of Four (super optional, nice to have):
  1. http://www.blackwasp.co.uk/gofpatterns.aspx


Learn SQL:
  1. Know these charts (this always comes up in interview + is important to understand): https://www.codeproject.com/Articles/33052/Visual-Representation-of-SQL-Joins

Learn Agile:
  1. Look at this page, read all of the sections.. The links are in blue on the right side of the page: http://www.agilenutshell.com/


Learn SDLC (Software Development Lifecycle):
  1. Watch this video: https://www.youtube.com/watch?v=kQPTB0ygYfY
  2. Learn how software is made: https://www.tutorialspoint.com/sdlc/sdlc_overview.htm

Interview Practice Questions
Study ALL of these. If you don’t know anything about any of the questions, go study all of it until you really understand it. Not joking, most of these will show up in an actual interview. Do not just memorize stuff, use it as your guide to learn all about these languages.


Read about the following so you know what they are
By this I mean spend 1-2 hours and summarize 3-4 sentences about each topics so you can at least intelligently speak about it if you hear it in an interview, on the job, talking with other developers, etc.. and so you have a background of what is upcoming and what development was like before. If any of these technologies are listed on the job description then definitely dig into it much more!!!
  • General/new stuff: ASP Core, Test driven development, Azure (web/worker roles, general technology offerings, how the cloud works), version-control like VSTS (Visual Studio Team Services) and TFS (Team Foundation Server), Node JS, Angular JS, React JS, Entity Framework Content Management System (CMS, like SiteFinity or SiteCore), Dependency Injection, Automated Testing, Performance Testing, know all the roles in a software team (Business Analyst, Quality Assurance Analyst, Project Manager, Database Administrator, Test Engineer)
  • Legacy / “old” stuff: WebForms, Access (the database), VB, VB.NET, F#,   

THESE MATTER!!! This will determine whether or not you get an interview. If you are applying to small places and not getting an interview, then work on making these better.
  • Build a strong resume
    • Explain on every job what the company does and what your role was as the first sentence
    • Explain why your role was important and what you brought to the table
    • Highlight your accomplishments
    • Explain specific technologies / etc what you worked with (very industry specific and varies a lot depending on what kind of job it was)
    • Do not make the text eensy weensy
    • Get a good structure/format for your resume
    • Put the months and years for everything
    • Do not add colors or crazy designs. Clean, simple, black text, white backgrounds. People print resumes. People don’t want to run out of ink printing resumes.
  • Build a strong cover letter
    • Write about why you care about working at this company at this position
    • Write about why pick you
    • Write about solid things and steps you have taken to be competent
    • Write about your passion
    • Thank them for their time and be very passionaite and positive about the whole process


Practice Interview Skills

  • Confidence
  • It’s good to say you don’t know and be honest when you don’t
  • Questions are open ended, if you don’t know the answer then talk about what you do know about the technology
  • Never interrupt the interviewer
  • Explain things with a summary first, then dive deeper into what you know. Don’t go off on tangents. Learn to be able to explain anything well to a 5 year old.. If you can’t do that you aren’t explaining it well enough. You should always be able to tell a non-technical person what you are doing at a high level so they understand what is going on
  • Always ask questions at the end about things that were said during the interview
  • Always ask questions about the job in general so you understand exactly what you will be getting into and what it will be like to work for a certain company

Saturday, July 15, 2017

Azure CLI 2.0 Reference Guide


Azure CLI 2.0 cheatsheet for Login, Resources, VMs, Resource groups, Storage, Batch, and Containers.

---------------------------------------------------------------------------------
LOGGING IN
---------------------------------------------------------------------------------
# Login with web
az login

# Login in CLI
az login -u myemail@address.com


---------------------------------------------------------------------------------
LISTING LOCATIONS AND RESOURCES / GENERAL
---------------------------------------------------------------------------------
# List all locations
az account list-locations

# List all my resource groups
az resource list

# Get what version of the CLI you have
azure --version

# Get help
azure help

---------------------------------------------------------------------------------
CREATING BASIC VM / RESOURCE GROUP / STORAGE ACCOUNT
---------------------------------------------------------------------------------
# Get all available VM sizes
az vm list-sizes --location eastus

# Get all available VM images for Windows and Linux
az vm image list --output table

# Create a Linux VM
az vm create --resource-group myResourceGroup --name myVM --image ubuntults

# Create a Windows VM
az vm create --resource-group myResourceGroup --name myVM --image win2016datacenter

# Create a Resource group
az group create --name myresourcegroup --location eastus

# Create a Storage account.
az storage account create -g myresourcegroup -n mystorageaccount -l eastus --sku Standard_LRS

---------------------------------------------------------------------------------
DELETING A RESOURCE GROUP
---------------------------------------------------------------------------------
# Permanetly deletes a resource group
az group delete --name myResourceGroup


---------------------------------------------------------------------------------
MANAGING VM'S
---------------------------------------------------------------------------------
# List your VMs
az vm list

# Start a VM
az vm start --resource-group myResourceGroup --name myVM

# Stop a VM
az vm stop --resource-group myResourceGroup --name myVM

# Deallocate a VM
az vm deallocate --resource-group myResourceGroup --name myVM

# Restart a VM
az vm restart --resource-group myResourceGroup --name myVM

# Redeploy a VM
az vm redeploy --resource-group myResourceGroup --name myVM

# Delete a VM
az vm delete --resource-group myResourceGroup --name myVM

# Create image of a VM
az image create --resource-group myResourceGroup --source myVM --name myImage

# Create VM from image
az vm create --resource-group myResourceGroup --name myNewVM --image myImage


---------------------------------------------------------------------------------
MANAGING BATCH ACCOUNT
---------------------------------------------------------------------------------
# Create a Batch account.
az batch account create -g myresourcegroup -n mybatchaccount -l eastus

# Create a Storage account.
az storage account create -g myresourcegroup -n mystorageaccount -l eastus --sku Standard_LRS

# Associate Batch with storage account.
az batch account set -g myresourcegroup -n mybatchaccount --storage-account mystorageaccount

# We can now authenticate directly against the account for further CLI interaction.
az batch account login -g myresourcegroup -n mybatchaccount

# Display the details of our created account.
az batch account show -g myresourcegroup -n mybatchaccount

# Create a new application.
az batch application create --resource-group myresourcegroup --name mybatchaccount --application-id myapp --display-name "My Application"

# Add zip files to application
az batch application package create --resource-group myresourcegroup --name mybatchaccount --application-id myapp --package-file my-application-exe.zip --version 1.0

# Assign the application package as the default version.
az batch application set --resource-group myresourcegroup --name mybatchaccount --application-id myapp --default-version 1.0

# Retrieve a list of available images and node agent SKUs.
az batch pool node-agent-skus list

# Create new Linux pool with VM config
az batch pool create \
    --id mypool-linux \
    --vm-size Standard_A1 \
    --image canonical:ubuntuserver:16.04.0-LTS \
    --node-agent-sku-id “batch.node.ubuntu 16.04”

# Now let's resize the pool to start up some VMs.
az batch pool resize --pool-id mypool-linux --target-dedicated 5

# We can check the status of the pool to see when it has finished resizing.
az batch pool show --pool-id mypool-linux

# List the compute nodes running in a pool.
az batch node list --pool-id mypool-linux

# If a particular node in the pool is having issues, it can be rebooted or reimaged.
# A typical node ID will be in the format 'tvm-xxxxxxxxxx_1-<timestamp>'.
az batch node reboot --pool-id mypool-linux --node-id tvm-123_1-20170316t000000z

# Re-allocate work to another node.
az batch node delete \
    --pool-id mypool-linux \
    --node-list tvm-123_1-20170316t000000z tvm-123_2-20170316t000000z \
    --node-deallocation-option requeue

# Create a new job to encapsulate the tasks that we want to add.
az batch job create --id myjob --pool-id mypool

# Add tasks to the job.
# …where <shell> is your preferred shell for execution (/bin/sh, /bin/bash, /bin/ksh etc.),
# and /path/to/script.sh is, of course, the full path of the shell script you’re invoking to
# get things started.
az batch task create --job-id myjob --task-id task1 --application-package-references myapp#1.0 --command-line "/bin/<shell> -c /path/to/script.sh"

# Add many tasks at once
az batch task create --job-id myjob --json-file tasks.json

# Now that all the tasks are added - we can update the job so that it will automatically
# be marked as completed once all the tasks are finished.
az batch job set --job-id myjob --on-all-tasks-complete terminateJob

# Monitor the status of the job.
az batch job show --job-id myjob

# Monitor the status of a task.
az batch task show --job-id myjob --task-id task1

# Delete a job
az batch job delete --job-id myjob


---------------------------------------------------------------------------------
MANAGING CONTAINERS
---------------------------------------------------------------------------------
# If you HAVE AN SSH run this to create an Azure Container Service Cluster (~10 mins)
az acs create -n acs-cluster -g acsrg1 -d applink789

# If you DO NOT HAVE AN SSH run this to create an Azure Container Service Cluster (~10 mins)
az acs create -n acs-cluster -g acsrg1 -d applink789 --generate-ssh-keys

# List clusters under your whole subscription
az acs list --output table

# List clusters in a resource group
az acs list -g acsrg1 --output table

# Display details of a container service cluster
az acs show -g acsrg1 -n acs-cluster --output list

# Scale using ACS
az acs scale -g acsrg1 -n acs-cluster --new-agent-count 4

# Delete a cluster
az acs delete -g acsrg1 -n acs-cluster


Thursday, May 4, 2017

Practical Git Commands Kickstart


Git command line is extremely useful for managing your resources – it is the only way to utilize all Git commands possible as most GUI’s only have a set of available commands.  Although many guides exist to explain Git command line, many are brief introductions or extremely comprehensive.  I will share a practical guide of commands I needed to use to get through my day, no more, no less as part of a kick start to get you going with Git.  I will list commands by group in tables and will give an explanation below each table in italics for why/when you need these commands if you are new to Git.


Project/Directory Setup Commands
Use/Explanation
git init
New repository from current directory
git init <directory>
New repository to a specific directory
git clone /path/to/repository
Connecting to an existing local repository
git clone username@host:/path/to/repository
Connecting to an existing remote repository
You need initialize a local file directory to be a Git repository for a new project (your local file directory will be associated with a certain online repository).  Initializing will create a .git folder in the directory and this is where Git will record different versions of the project and the .git folder will contain all of the metadata and changes to the project (rest of the project will not be altered while you are working). 


Adding/Staging/Unstaging Files Commands
Use/Explanation
git add filename.txt
Stages a specific file to commit
git add -A
Stages all
git add .
Stages new and modified, without deleted. *This add command is most commonly used
git add -u
Stages modified and deleted, without new
git add *
Stages all files in current directory except files whose name begin with a dot. Wildcard interpreted as part of git.
git reset -- filename.txt
Unstages a file by name, the changes are still there that you made but it will not be committed until you add it back
git reset
Unstages all files (again changes are still there and now nothing is committed until you add it in)
git status
Checking file status (see which files are staged/unstaged for the commit)
Staging and unstaging do not affect the changes of the files or delete and files, they are for adding/removing files to track for a commit or stash.  You push your commits to make a change.  In Git, you stage(add) the files you want to commit and unstage (reset) files you do not want to commit. Note ‘--’ in a command specifies we are talking about a file, not a branch (in case some file names are the same as a branch name).


Commit/Reset Commands
Use/Explanation
git commit -m “Your message here to describe what you are committing to your branch.”
Commit changes with a message
git checkout <file>
Abandon/Undo changes to one file
git reset --hard HEAD~1

Removing the most recent one commit (HEAD~1 means the commit before the head)
git log
Find a commit id
git reset --hard <sha1-commit-id>
Removing a very specific commit id
git reset --hard
Removing all commits/changes and reset back to original branch pulled
Committing is not permanent, do not be afraid to commit. You don’t have to push your commit. You can roll back this commit easily if you want to erase all of it and go back to the original code in the branch. You must commit or stash everything before you can change branches, pull new commits in, etc (see final table for stashing info). 


Push/Pull Commands
Use/Explanation
git push
Pushing changes from current branch to the same current branch
git push originally-cloned-branch new-branch
Pushing changes from an originally cloned branch to a new branch
git fetch
Fetching commits and remote branch changes, does not put new changes into your code until you pull though
git pull
Pulls all the latest commits to your current branch from the server
You must run a git fetch to see new commits or any new branches added to your repository. Git pull does a git fetch + git merge. You can git fetch anytime to update remote tracking branches or see any latest commits from others. If you already pushed a commit and need to revert it, you can do a force push to get rid of it but honestly it is safer for you to create a new branch and fix your changes as others are working in the same code (pushing is a little permanent, make sure you test everything out before you push your changes to the server where other developers will see your work).


Switching/Creating Branches
Use/Explanation
git checkout -b my-new-branch-name

Create a new branch based on your current branch, and switch to the new branch. Note the -b means that you need to create a new branch
git checkout -b new-branch existing-branch
Create a new branch based on a specific branch
git checkout existing-branch-name
Switching to another existing branch
Make sure you commit or stash your changes before trying to change branches.  Note: you are able to swap between different branches with one code same base—all of the changes that appear are applied based on the contents of the .git folder on top of the original files. 


Merging Branches Commands
Use/Explanation
git merge branchname
Merges branchname into your current branch. Make sure to pull latest into both your current branch and the branch to merge in
git reset --merge .
Abandon a merge with merge conflicts, goes back to state you were in before you attempted to merge. Can use this command if Git v1.6.1+
git reset --hard HEAD
If Git version is less than 1.6.1 then use this to abandon a merge
You merge one branch into another one, for example if you are working in a feature branch and want to put your work into develop.. or if you want to merge stable develop changes into QA.  Careful with merge conflicts and to test after fixing all of them before committing and finally pushing to the server.


Dealing with Stashes Commands
Use/Explanation
git stash
Stash all tracked files without a message/description to index 0
git stash save “my description here”
Stash all tracked files that have not yet been committed
git stash save -u “my description here”
Stash all files that have not yet been committed including untracked files
git stash pop
-or-
git stash apply
All changes to stashed files will be applied to the current workspace (unstashing). You can reapply to same branch or apply changes to a new branch. By default gets stash@{0}. Important: git stash pop throws away the stash after applying it, whereas git stash apply leaves it in the stash list for possible later reuse.
git stash pop stash@{2}
-or-
git stash apply stash@{2}
Specifies which index to apply/unstash to your current workspace
git stash list
List the current stashes, you can see the index of each one to delete a certain one
git stash clear
Clear/Delete all the current stashes
git stash drop stash@{0}
Replace {0} with the index of the stash you want to drop

Use git add/reset to determine which files you want to stash. You can stash changes as a “save-state” so you can do work in another branch, all changes will be saved in your local Git repo and nothing from the stash will go to the server.   You can easily unstash your changes onto the same or another branch.  You can apply one stash to multiple other branches.  Sometimes you may make a feature branch and make a lot of foundational domain changes.. then suddenly you realize another developer needs your changes to work.  You can stash your changes and unstash them on top of the other branch so you are both working in the same branch with shared foundational code. New git stashes by default are always created to stash@{0}, and older ones’ will have the index pushed to higher index numbers.


Wednesday, April 26, 2017

Use of AoP in Cross Cutting Aspect of Error Handling


Cross Cutting Concerns are global concerns that span across methods, classes, applications—and can be concerns widely affecting a whole company or industry.  Think of patient records or a financial history, and things always needed in those industries and how it affects each method of code! There are all kinds of required security for each step and any errors need to be carefully logged.  In other words, integral parts of an application that have to be performed across the layers.  Examples are Logging, Exception/Error Handling, Data Validation, Business Rules, Caching, Security, Communication, and others. 

Aspect Oriented Programming (AOP) = program it once in its own section, and apply it as needed throughout the application.  You should only add something to this section if it is to be reused often.  If it is only a couple of times, try to implement it directly in your code to cut down on abstracting away too much.  On the good, and bad, side.. anything implemented here with a bug is easily fixed in one place, but can wreck havoc globally.

Java supports AOP, whereas C# only partially supports it (hence PostSharp and other 3rd party extensions).  An application with strong architecture tends to have separate layers so different concerns don’t interact more than necessary, which is better for maintainability and for changes over time.  AOP separates general code form code that is globally reusable code present throughout the layers; this is addressing the crosscutting concern. 
So now our code, for example could be separated into:
  • ·       Presentation layer
  • ·       Domain logic layer
  • ·       Data storage layer
  • ·       General globally needed stuff layer (like Exceptions and Logging!)

You can standardize exception handling using AOP and reduce the amount of code written for exception handling.  Most commonly in .NET, you will see post-processing (PostSharp) and code interception (dependency injection). As a sample for how to use AoP to address the cross cutting aspect of Error handling, we will talk about PostSharp.

Using PostSharp for post-processing, you can handle all of the exceptions in one system though a single function. Using PostSharp, you add an attribute [ExceptionAspect] to a method and PostSharp will wrap the method in a try/catch block for you.  This cuts down on code added and allows you to reuse the same try/catch logic over and over again easily.  You can customize your exception handling logic with PostSharp  Please see here for detailed instructions on how to download and implement PostSharp: https://michaelllucas.wordpress.com/2014/11/05/exception-handling-using-postsharp-c/

Sample scenario: You have a win forms project with an in-memory data store.  You search for a name that isn’t in the list and get an error that is cryptic and shows too much sensitive info. 

Below is a normal try/catch:


Below is a custom exception wrapper using PostSharp (this is our Aspect class):

You can handle the issue in the data layer by creating the Database Exception Wrapper and customizing the logic for showing a useful and non-sensitive message.

Below is a try catch using PostSharp:

Notice the attribute at the top using the [DatabaseExceptionWrapper], now the entire function that was wrapped before is considered wrapped in the custom try catch wrapper just made.
“The way OnExceptionAspect works is by wrapping the method in a try/catch block and catching exceptions of type Exception. But there will be cases when you want to handle a specific type of error.” You can specify in the aspect class (in our case the DatabaseExceptionWrapper class) what type of error you want to catch so you aren’t catching all general errors. 

Below it specifies to only catch the InvalidOperationException.

*Note screenshots and sample are from: http://www.postsharp.net/blog/post/Day-1-e28093-OnExceptionAspect (I just distilled it down to summarize it here).

Potential cons of PostSharp:  Increased build times. May need to exclude from local build.  Most say advantages outweigh increased build time (http://stackoverflow.com/questions/417163/anyone-with-postsharp-experience-in-production).

References:

Extra reading:


Xamarin Test Cloud Best Practices


Do’s:
  • Get test cases from QA. One great reason for Test Cloud is to be able to complete a base set of smoke tests or comprehensive testing so that QA can do exploratory testing for new issues / rare cases.  
  • Take a lot of screenshots using ‘app.Screenshot()’ and use a very descriptive name / sentence to describe the step occurring. The only views you will see on Test Cloud will be these screenshots.
  • Name your elements the same between iOS and Android, otherwise you will have a lot of nasty if/else statements in your code.
  • Repeat code as much as possible. If you have 10 tests for buying an item.. take a separate reusable method that logs you in, and call this method many times. The make another method that will add something to your cart, and call this method many times. In case the ‘login’ button name changes, you do not want to be changing your hardcoded app.Tap(“element_name”) in 50 locations, you want to have to only change this is one place if possible.
  • Naming conventions: Try to keep really good naming conventions like large_button_text_on_button or icon_close so that it is easy to identify or even identifiable without going through REPL.  The less time you have to search for elements in REPL, the quicker it will be to complete development.
    • *Make sure you do have a label of some kind to hook onto. If there is no class/id/other name, add one!!! Otherwise you end up doing a hackish thing where you hook something onto the 5th element on the page that is a button or something, and it’s not pretty.
  • Tests can run on average 30 s – 6 minutes or so depending on the app. Try to break down your test scenarios into smaller pieces—as everything is hardcoded, the longer the test the higher probability it can break with any new changes / updates to the app.
  • If you are debugging your app, add app.Repl(); right before it breaks so you can debug and figure out what is going on.
  • Get really good at app.Query();, you will probably use these a lot to find elements.
  • Try to automate when a build goes out, so does a script to test cloud to run smoke/full sets of tests.

Do Not’s:
  • Map anything to x/y coordinates. This changes a lot based on the device you use.
  • For whatever element you choose to wire your test cloud to.. make sure you do not name multiple things on the page the same thing whether it’s a class/id, etc..

Notes:
  • There is an option for a live recording of your phones on Test Cloud. It is a setting when you submit your tests to the cloud to run. You can choose to send a subset of tests or all of the tests.  Subsets are defined using an attribute above the test name. You can add more than one category to a test, for ex. If it is part of a smoke test, part of a login screen test, etc.
  • You probably are not going to get 100% of tests working all the time, phones on Test Cloud will
  • It seems safe to run about 6-10ish types of varied devices per run to conserve hours to get a good idea of if your app is working across most devices.  You can run more if you are not concerned about saving on hours.  
  • You can plug in a physical device also to your computer and run test cloud on that. Make sure you enable debugging on your device. This is a good way to test on iOS if you are only using a Windows computer.
  • You are probably going to have to use some platform specific if statements, for ex. Typing text into an input may not work with .Tap() and you need .Enter(). Make sure you always inject the platform into your classes using DI everywhere.  It happens, sometimes things just don’t work in both platforms the same.
    • if (platform == Platform.Android) {}
    • if (platform == Platform.iOS) {} 

Pain points:
  • If your naming convention is bad or non-existent, consider going through the app to fix this.  It will save you time to re-name elements in a clean way as opposed to trying to hookup Test Cloud to poorly named pieces.  Especially if iOS/Android are different, try to keep these aligned. You can eat a lot of development time if the names are bad, different between iOS/Android, and if elements are hard to find.
  • Remember everything is completely specific to the flow. If you do a UI test to login, add an item, and hit checkout.. and someone adds a new page in for a promotion before you checkout.. it will break your tests. If an element is removed or changed, the tests will break.  There is some upkeep/maintenance to consider, though it should be quick changes.